
If you’re like me, you enjoy traveling to new and interesting cities. One of the wonderful things great cities have to offer is the chance to view and experience outstanding and occasionally extraordinary art. Sometimes you have the chance to take museum photos.
 Often cities also have natural history, science and other museums dedicated to some industry or sport, or other specialized subject, such as the Smithsonian Air and Space Museum’s aircraft and space vehicles. All can have great photographic opportunities.
Here are some tips for you to take photographs in museums.
• You’ve got to know the museum’s ground rules. You must determine if photography is permitted in the museum and on its grounds. While most museums do permit some photography, often with limitations, such as no flash photography, there are still many museums in the world which ban photography altogether.
• Even if there are “No Photography” signs as you enter the museum, it won’t do any harm to ask at the information desk whether the signs mean no photography, or just no flash photography. I’ve been pleasantly surprised many times, especially in Europe, to find they just want to prevent flash photography. The light from electronic flashes can damage some art work, and be very disconcerting to museum visitors.
• If photography is forbidden, put your camera in its bag. Don’t try to sneak in any photographs. Don’t be the “ugly” tourist.
 • If only flash photography is forbidden, don’t try slipping in a few flash photographs. If enough people do that, it might eventually move the museum to ban photography all together. You don’t want to help cause the ban because of your thoughtlessness. If you have a separate flash, put it away. If you have a built-in flash, turn it off.
• The light level at many museums often means you need to open your lens, slow down your shutter speed and/or use a high ISO setting in your digital camera, or use high speed film. If you could use a monopod or tripod, that would certainly help combat those conditions and permit a sharp, clear photograph; however, tripods and monopods are rarely permitted in a museum, as they interfere with visitors’ movement.
If you have a tripod or monopod, ask if you’re permitted to use them before entering the museum. At a recent tour of Winterthur, I brought my tripod for outdoor garden photos. When I toured the museum itself, even though it was in a case, I was required to check my tripod.
• Lenses and cameras with image stabilization or vibration reduction are extremely helpful in museums. If you have that capability, turn it on. It will allow you to get sharp photos at slow shutter speeds.
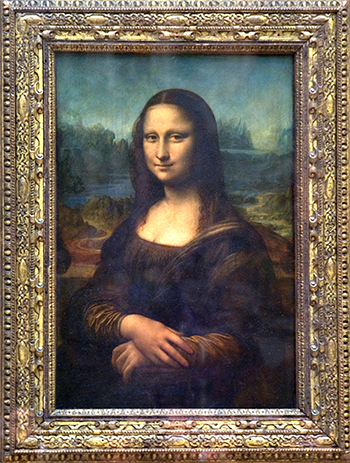
• Respect the art and respect fellow museum visitors. Many museums have ropes or some kind of barricade preventing you from getting too close to an especially popular exhibit or piece of art, such as the Mona Lisa in the Louvre in Paris, but usually there’s nothing to prevent you from getting close. If you can get close, respect the art and the others viewing it by not monopolizing the space near it. Let everyone have a chance.
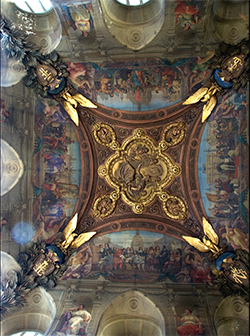 • The museum’s collection might not be the only thing worthwhile photographing there. Sometimes the museum itself is spectacular. Parts of the Louvre in Paris, and the Pennsylvania Academy of the Fine Arts in Philadelphia have amazing exterior and interior architecture. The photograph on the right was taken at the Louvre. It’s not a painting or even a mosaic. It’s a ceiling of one of the galleries at the Louvre and a magnificent work of art itself.
• If you’re using an SLR or DSLR, don’t forget to bring a wide angle or wide angle zoom lens. It’s often needed in a museum for photographs of the museum itself or some larger sculptures or other exhibits.
• Ambient lighting in museums consists of artificial light or a combination of artificial and natural light. Therefore, unless your flash is your main light source, the automatic white balance setting on your digital camera may not produce accurate results. You may be better off manually setting white balance. Some DSLR cameras allow you to create a custom white balance setting. Use a WhiBal card, or consider getting an Expo Disc to get the correct white balance setting. For point-and-shoot digital cameras include the WhiBal card in a couple of photos which will give you a white balance reference to help you color correct your photos in your computer.
Ned Levi is a long time professional photographer with a passion for wildlife and travel photography. You can view some of Ned’s travel and other photos at NSL Photography, or get more travel photography information on his Blog.
After many years working in corporate America as a chemical engineer, executive and eventually CFO of a multinational manufacturer, Ned founded a tech consulting company and later restarted NSL Photography, his photography business. Before entering the corporate world, Ned worked as a Public Health Engineer for the Philadelphia Department of Public Health. As a well known corporate, travel and wildlife photographer, Ned travels the world writing about travel and photography, as well as running photography workshops, seminars and photowalks. Visit Ned’s Photography Blog and Galleries.